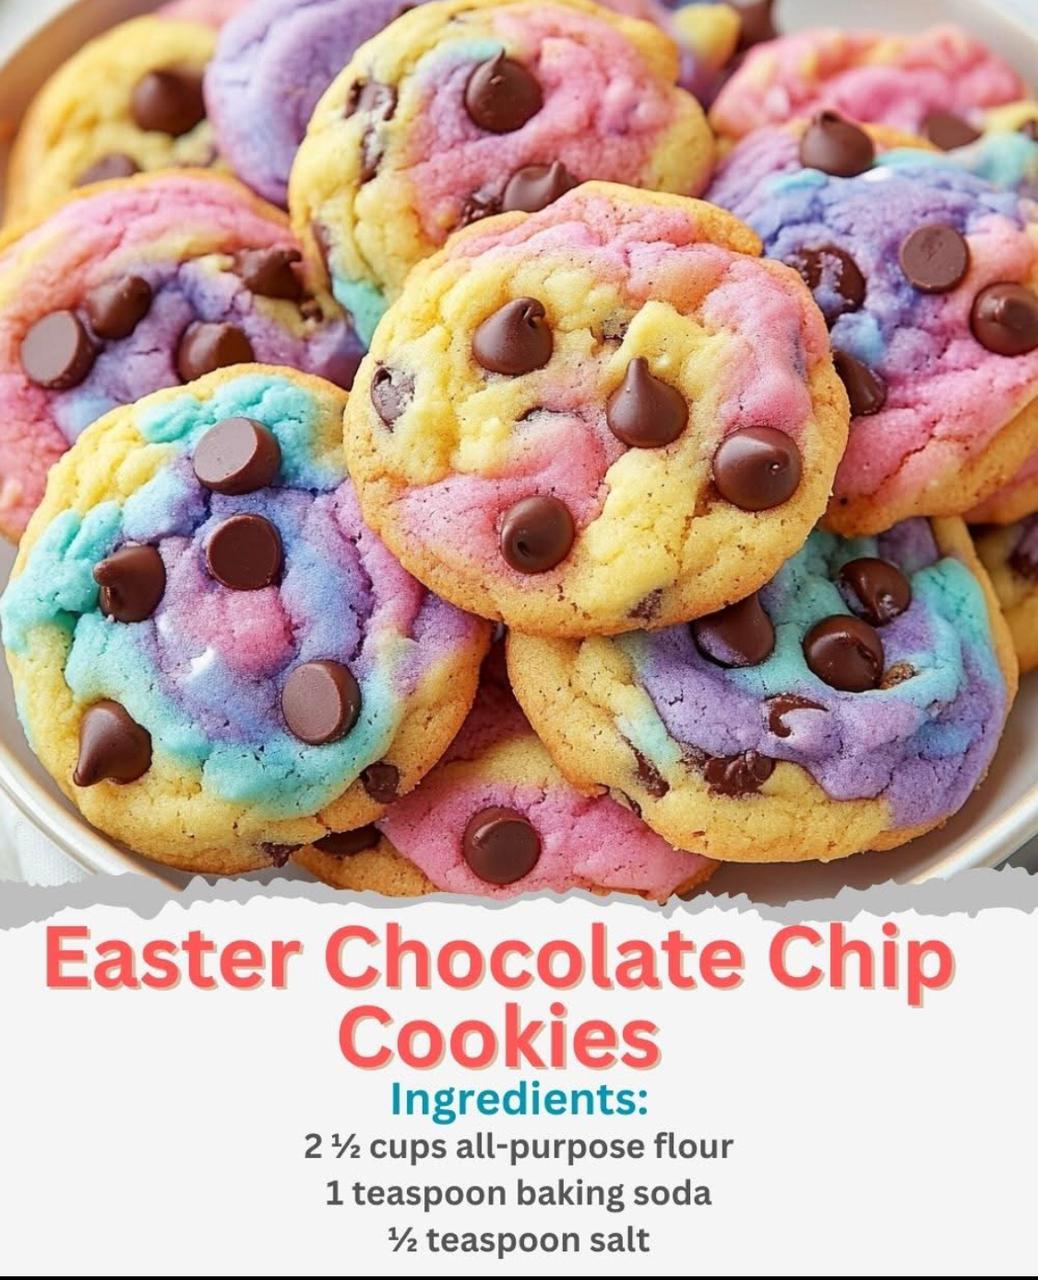
Easter is the perfect time to get creative in the kitchen, and these Easter Chocolate Chip Cookies are a fun, colorful twist on the classic chocolate chip cookie! I love making these with my kids, letting them mix the pastel-colored doughs for a beautiful marbled effect. The result? Soft, chewy cookies packed with gooey chocolate chips and a burst of springtime cheer.
Whether you’re baking for an Easter gathering, a springtime picnic, or just want a sweet treat to celebrate the season, these cookies are sure to impress both kids and adults alike!
Why You’ll Love This Recipe
✔ Fun & Festive – The pastel swirl effect makes these cookies a beautiful addition to any Easter celebration.
✔ Soft & Chewy – The perfect balance of crispy edges and a tender center.
✔ Kid-Friendly – A great baking project for little ones who love playing with colors.
✔ Customizable – Swap chocolate chips for white chocolate or add Easter sprinkles for extra flair.
✔ Make-Ahead Friendly – Prepare the dough in advance and chill for later baking.
Ingredients
For the Cookie Dough:
- 2 ½ cups all-purpose flour
- 1 teaspoon baking soda
- ½ teaspoon salt
- 1 cup (2 sticks) unsalted butter, softened
- ¾ cup granulated sugar
- ¾ cup brown sugar, packed
- 2 large eggs
- 2 teaspoons vanilla extract
- Gel food coloring (pastel pink, purple, yellow, and blue)
- 2 cups chocolate chips (semi-sweet, milk, or white chocolate)
Optional Toppings:
- Easter sprinkles
- Pastel-colored candy-coated chocolates (like M&M’s)
- White chocolate drizzle
Step-by-Step Instructions
1. Preheat and Prepare
- Preheat your oven to 350°F (175°C).
- Line baking sheets with parchment paper to prevent sticking.
2. Mix Dry Ingredients
- In a medium bowl, whisk together flour, baking soda, and salt.
- Set aside.
3. Cream Butter and Sugars
- In a large mixing bowl, beat butter, granulated sugar, and brown sugar with a hand mixer or stand mixer on medium speed until the mixture is light and fluffy (about 2-3 minutes).
- Add eggs one at a time, beating well after each addition.
- Stir in vanilla extract.
4. Combine Wet and Dry Ingredients
- Gradually add the dry ingredient mixture to the wet ingredients, mixing until just combined.
- Avoid overmixing, as this can make the cookies tough.
5. Divide and Color the Dough
- Divide the dough into four equal portions.
- Tint each portion with a different pastel gel food coloring (pink, purple, yellow, and blue).
- Mix each color gently until evenly distributed.
6. Form the Cookies
- Take small portions of each colored dough and press them together to form a marbled ball.
- Do not overmix, or the colors will blend too much.
- Place dough balls on the prepared baking sheet, spacing them 2 inches apart.
- Gently flatten each ball slightly for even baking.
- Sprinkle additional chocolate chips or pastel candy-coated chocolates on top for extra color.
7. Bake to Perfection
- Bake for 10-12 minutes, or until the edges are lightly golden but the centers are still slightly soft.
- Let cookies cool on the baking sheet for 5 minutes before transferring to a wire rack to cool completely.
Serving & Storage Tips
Best Ways to Serve:
- Serve warm for soft, gooey chocolate.
- Pair with a glass of milk for a comforting treat.
- Stack cookies and tie with a ribbon for Easter gift bags.
How to Store:
- Room Temperature: Store in an airtight container for up to 5 days.
- Refrigerator: Store in the fridge for up to 1 week (bring to room temp before serving).
- Freezer: Freeze baked cookies for up to 3 months. Let thaw at room temperature before eating.
- Freeze Cookie Dough: Shape dough into balls and freeze for up to 3 months. Bake from frozen, adding 1-2 extra minutes.
Helpful Tips for the Best Cookies
✔ Chill the Dough: If you want thicker cookies, chill the dough for 30 minutes before baking.
✔ Swirling Tip: Avoid overmixing colors so the marbling effect remains distinct.
✔ Chocolate Choices: Try using white chocolate chips, pastel candy melts, or a mix of chocolate varieties.
✔ Butter Matters: Use softened butter, not melted, for the best cookie texture.
✔ Flour Measuring Tip: Spoon flour into the measuring cup and level off with a knife for accuracy.
Flavor Variations
🌸 White Chocolate & Sprinkles: Use white chocolate chips and add Easter sprinkles for an extra festive look.
🌸 Stuffed Cookies: Press a mini marshmallow or mini peanut butter cup inside each dough ball before baking.
🌸 Fruity Easter Cookies: Add lemon zest or orange zest for a citrusy twist.
🌸 Chocolate Overload: Drizzle melted white or dark chocolate over the cooled cookies.
Frequently Asked Questions
1. Can I use liquid food coloring instead of gel?
Gel food coloring is best because it provides vibrant colors without altering the dough consistency. If using liquid food coloring, you may need to add a little extra flour to keep the dough from becoming too soft.
2. Can I make these cookies without food coloring?
Absolutely! You can skip the food coloring and still enjoy delicious classic chocolate chip cookies with this same recipe.
3. How do I prevent my cookies from spreading too much?
If your cookies spread too much:
✔ Chill the dough for 30 minutes before baking.
✔ Ensure your butter is softened, not melted.
✔ Use parchment paper instead of greasing the pan.
4. Can I use a different type of chocolate?
Yes! Feel free to use:
✔ Milk chocolate for extra sweetness.
✔ Dark chocolate for a richer flavor.
✔ Pastel-colored candy-coated chocolates for a festive Easter look.
5. Can I make these cookies ahead of time?
Yes! The dough can be stored in the refrigerator for up to 3 days or frozen for later use. Just scoop and bake when ready!
Final Thoughts
These Easter Chocolate Chip Cookies are the perfect way to bring color, joy, and deliciousness to your holiday baking! With their soft, chewy texture and marbled pastel swirls, they’re as beautiful as they are delicious. Whether you’re baking them for family gatherings, Easter parties, or as edible gifts, they’ll be a guaranteed hit.
So grab your pastel food coloring, chocolate chips, and a mixing bowl, and let’s make some Easter magic!
Happy Baking & Happy Easter!